一、基于 chip_test.csv数据集,建立逻辑回归模型(二阶边界),评估模型表现 1、加载数据 1 2 3 4 5 import pandas as pdimport numpy as npdata = pd.read_csv('chip_test.csv' ) data.head()
2、为数据添加标签 合格即为 true,否则为 false
1 2 3 mask = data.loc[:, 'pass' ] == 1 print(~mask)
3、数据的可视化 plt.scatter()原型如下:
1 matplotlib.pyplot.scatter(x, y, s=None , c=None , marker=None , cmap=None , norm=None , vmin=None , vmax=None , alpha=None , linewidths=None , verts=None , edgecolors=None , *, data=None , **kwargs)
x、y:表示的是大小为(n, )的数组,也就是我们即将绘制散点图的数据点
s:一个实数或者是一个数组大小为(n, ),点的所占的面积大小
c:颜色
marker:表示的是标记的样式,默认的是 'o'
cmap:Colormap实体或者是一个colormap的名字,cmap仅仅当c是一个浮点数数组的时候才使用(默认image.cmap)
norm:Normalize实体来将数据亮度转化到0-1之间,也是只有c是一个浮点数的数组的时候才使用(默认colors.Normalize)
vmin、vmax:实数,当norm存在的时候忽略(用来进行亮度数据的归一化)
alpha:实数,调整线不透明度(0-1)
linewidths:也就是标记点的长度
1 2 3 4 5 6 7 8 9 10 11 %matplotlib inline from matplotlib import pyplot as pltfig1 = plt.figure() passed = plt.scatter(data.loc[:, 'test1' ][mask], data.loc[:, 'test2' ][mask]) failed = plt.scatter(data.loc[:, 'test1' ][~mask], data.loc[:, 'test2' ][~mask]) plt.title('test1-test2' ) plt.xlabel('test1' ) plt.xlabel('test2' ) plt.legend((passed, failed), ('passed' , 'failed' )) plt.show()
4、定义X、y变量 1 2 3 4 5 6 X = data.drop(['pass' ], axis=1 ) y = data.loc[:, 'pass' ] X1 = data.loc[:, 'test1' ] X2 = data.loc[:, 'test2' ]
5、定义X1方、X2方等变量 DataFrame是Python中Pandas库中的一种数据结构,它类似excel,是一种二维表。DataFrame的单元格可以存放数值、字符串等,这和excel表很像,同时DataFrame可以设置列名columns与行名index,如下通过 X_new设置了五列:
1 2 3 4 5 6 7 X1_2 = X1*X1 X2_2 = X2*X2 X1_X2 = X1*X2 X_new = {'X1' :X1, 'X2' :X2, 'X1_2' :X1_2, 'X2_2' :X2_2, 'X1_X2' :X1_X2} X_new = pd.DataFrame(X_new) print(X_new)
6、建立实例并训练模型 1 2 3 4 from sklearn.linear_model import LogisticRegressionLR2 = LogisticRegression() LR2.fit(X_new, y)
7、预测数据 1 2 3 4 5 from sklearn.metrics import accuracy_scorey2_predict = LR2.predict(X_new) accuracy2 = accuracy_score(y, y2_predict) print(accuracy2)
8、获取曲线参数 1 2 3 4 5 X1_new = X1.sort_values() theta0 = LR2.intercept_ theta1, theta2, theta3, theta4, theta5 = LR2.coef_[0 ][0 ], LR2.coef_[0 ][1 ], LR2.coef_[0 ][2 ], LR2.coef_[0 ][3 ], LR2.coef_[0 ][4 ] print(theta0, theta1, theta2, theta3, theta4, theta5)
9、构建边界曲线 1 2 3 4 5 a =theta4 b = theta5*x1_new + theta2 c = theta0 + theta1*x1_new + theta3*x1_new*x1_new X_new_boundary = (-b + np.sqrt(b*b - 4 *a*c))/(2 *a)
10、画曲线 1 2 3 4 5 6 7 8 9 10 fig4 = plt.figure() plt.plot(X1_new, X_new_boundary) passed = plt.scatter(data.loc[:, "test1" ][~mask], data.loc[:, "test2" ][~mask]) failed = plt.scatter(data.loc[:, "test1" ][mask], data.loc[:, "test2" ][mask]) plt.title("test1-test2" ) plt.xlabel("test1" ) plt.ylabel("test2" ) plt.legend((passed, failed), ('passed' , 'failed' )) plt.show()
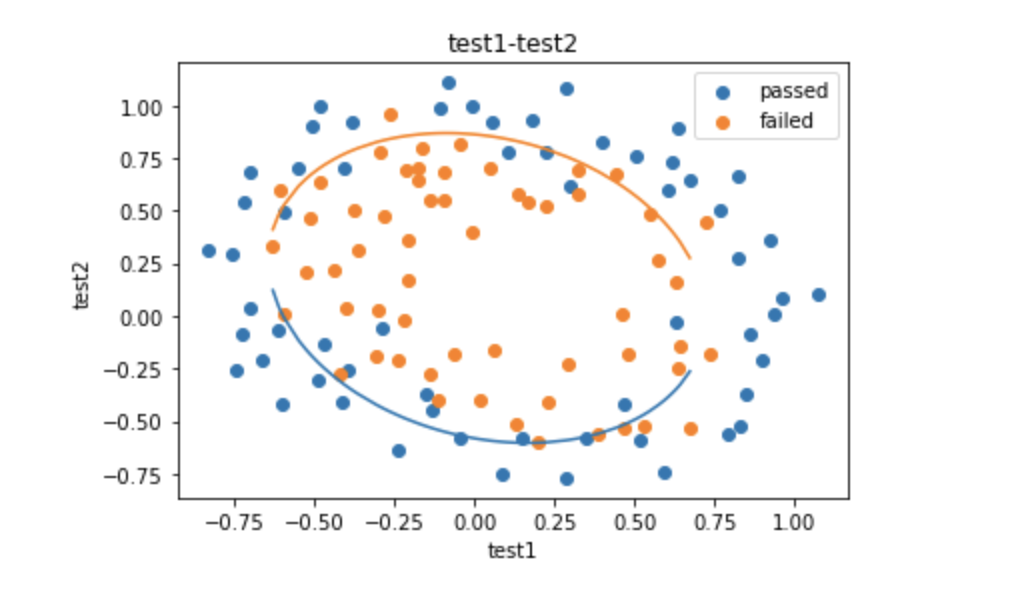
画出来的图像如下(图像并不完整):
我们只需加上如下代码:
1 2 X_new_boundary_2 = (-b - np.sqrt(b*b - 4 *a*c))/(2 *a) plt.plot(X1_new, X_new_boundary_2)
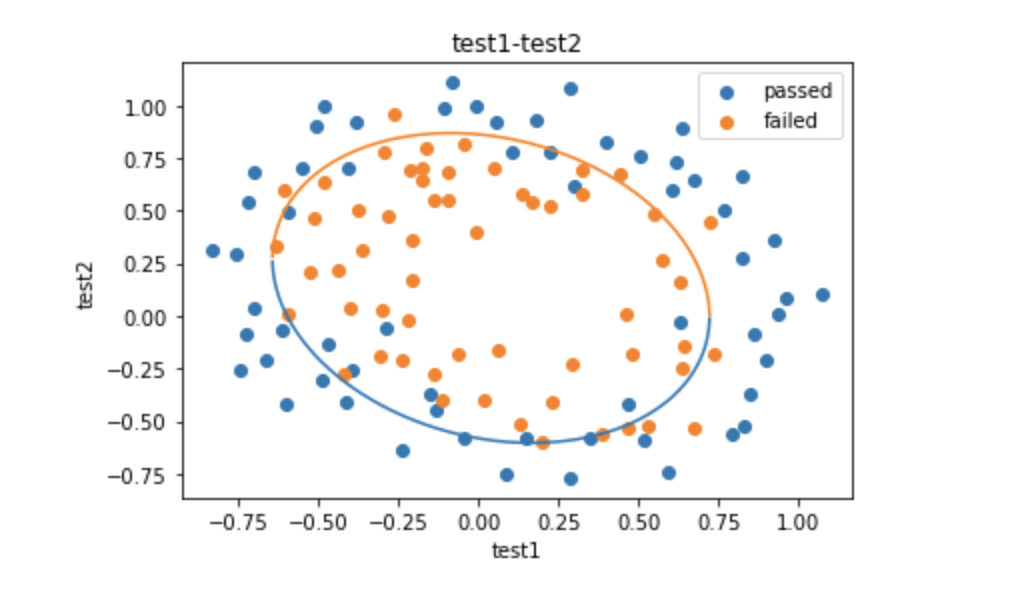
于是画出来的图像便变成如下所示:
二、以函数的方式求解边界曲线 1、定义函数f(x) 1 2 3 4 5 6 7 8 def f (X1_new ): a =theta4 b = theta5*X1_new + theta2 c = theta0 + theta1*X1_new + theta3*X1_new*X1_new X_new_boundary1 = (-b + np.sqrt(b*b - 4 *a*c))/(2 *a) X_new_boundary2 = (-b - np.sqrt(b*b - 4 *a*c))/(2 *a) return X_new_boundary1, X_new_boundary2
2、获取新边界 1 2 3 4 5 6 7 X2_new_boundary1 = [] X2_new_boundary2 = [] for x in X1_new: X2_new_boundary1.append(f(x)[0 ]) X2_new_boundary2.append(f(x)[1 ]) print(X2_new_boundary1, X2_new_boundary2)
3、画图 1 2 3 4 5 6 7 8 9 10 fig5 = plt.figure() plt.plot(X1_new, X2_new_boundary1) plt.plot(X1_new, X2_new_boundary2) passed = plt.scatter(data.loc[:, "test1" ][~mask], data.loc[:, "test2" ][~mask]) failed = plt.scatter(data.loc[:, "test1" ][mask], data.loc[:, "test2" ][mask]) plt.title("test1-test2" ) plt.xlabel("test1" ) plt.ylabel("test2" ) plt.legend((passed, failed), ('passed' , 'failed' )) plt.show()
图像如下(我们发现两边缺了一点):
4、补数据 将 x轴数据补多一点
1 2 3 4 5 6 7 X1_range = [-0.9 + x/10000 for x in range (0 , 19000 )] X1_range = np.array(X1_range) X2_new_boundary1 = [] X2_new_boundary2 = [] for x in X1_range: X2_new_boundary1.append(f(x)[0 ]) X2_new_boundary2.append(f(x)[1 ])
5、描绘出完整的决策边界曲线 1 2 3 4 5 6 7 8 9 10 fig6 = plt.figure() passed = plt.scatter(data.loc[:, "test1" ][~mask], data.loc[:, "test2" ][~mask]) failed = plt.scatter(data.loc[:, "test1" ][mask], data.loc[:, "test2" ][mask]) plt.plot(X1_range, X2_new_boundary1) plt.plot(X1_range, X2_new_boundary2) plt.title("test1-test2" ) plt.xlabel("test1" ) plt.ylabel("test2" ) plt.legend((passed, failed), ('passed' , 'failed' )) plt.show()
图如下:


